

If you’ve ever sat around a sizzling hibachi grill at your favorite Japanese steakhouse — the aroma of garlic butter and soy sauce swirling in the air — you know that hibachi fried rice recipe steals the show every single time.
I still remember the first time I tried it at a Benihana-style restaurant. The chef did that flashy egg toss (which landed perfectly, of course), tossed in a huge knob of butter, and suddenly the air smelled like pure heaven. I couldn’t wait to recreate it at home.
The good news? You don’t need a fancy flat-top grill or a chef’s hat to make authentic-tasting hibachi fried rice in your own kitchen. All you need is day-old rice, whisked eggs, a bit of garlic butter, and a hot skillet or wok. In this post, I’ll show you step-by-step how to make it — with the same smoky, buttery flavor you love, plus some insider tips to make it even better than takeout.
Why You’ll Love This Recipe
- Restaurant flavor at home: That same rich, buttery, umami-packed taste you crave from Japanese steakhouses.
- Quick and easy: Ready in about 20 minutes, start to finish.
- Budget-friendly: Uses simple, pantry staples like rice, soy sauce, and eggs.
- Customizable: Add chicken, shrimp, or veggies for a full meal.
- Perfect for leftovers: The ideal use for cold rice sitting in your fridge.
If you’ve ever wondered how chefs make that perfect hibachi-style fried rice, you’re about to find out.
Ingredients You’ll Need
Let’s break down what you need for this hibachi fried rice recipe.
For the Rice Base
- 4 cups cold, day-old rice – Preferably long-grain white rice or jasmine rice.
Tip: Day-old rice works best because it’s drier and won’t get mushy when stir-fried. - 2 tablespoons neutral oil (like canola or vegetable oil) – High smoke point oil is key for that hibachi sear.
- 2 large eggs, whisked – Adds richness and color.
For Flavor
- 2 tablespoons soy sauce – For saltiness and umami depth.
- 1 tablespoon garlic butter – The secret to that signature hibachi flavor.
- 1 teaspoon sesame oil – Adds that toasty, nutty aroma.
- Salt and pepper, to taste.
Add-Ins
- ½ cup chopped onions – Gives sweetness and texture.
- ½ cup mixed veggies (peas, carrots, corn) – Optional but classic.
- 2 green onions, finely chopped – For garnish and freshness.
Optional proteins:
- 1 cup cooked shrimp, chicken, or steak – for a full hibachi-style meal.
Prep, Cook, & Total Time
| Step | Time |
|---|---|
| Prep Time | 10 minutes |
| Cook Time | 10 minutes |
| Total Time | 20 minutes |
Ingredient Substitutions
- Rice: No leftover rice? Cook fresh rice, spread it on a baking sheet, and chill for 30 minutes before using.
- Soy sauce: Use tamari for gluten-free or low-sodium soy sauce for less salt.
- Garlic butter: Mix softened butter + minced garlic + pinch of salt as a quick homemade version.
- Sesame oil: Optional, but adds amazing depth. Substitute with toasted sesame seeds if needed.
- Oil: You can use avocado oil or peanut oil instead — both handle high heat beautifully.
How to Make Hibachi Fried Rice Recipe (Step-by-Step)
Step 1: Prep Your Ingredients
Before you start, make sure everything’s ready — this recipe moves fast!
Chop your onions and green onions, whisk your eggs, and measure out sauces. Fried rice is all about timing, and having everything within reach keeps it fun (and stress-free).
Step 2: Heat the Pan
Place a large wok or skillet over high heat. Add your oil and swirl it to coat the pan.
You’ll know it’s ready when you see faint wisps of smoke — that’s your sign to get cooking.
Step 3: Scramble the Eggs
Pour the whisked eggs into the hot pan. Stir quickly until they’re softly scrambled (about 30 seconds to 1 minute).
Remove and set them aside. Don’t overcook — they’ll go back in later.
Step 4: Stir-Fry the Veggies
Add a bit more oil to the pan and toss in your chopped onions. Cook for 3–4 minutes, stirring frequently, until softened and lightly golden.
Add your mixed vegetables and cook another minute until heated through.
Step 5: Add the Rice
Now for the best part — the rice!
Add your cold, day-old rice straight into the pan. Use a spatula to break up clumps and stir-fry for about 3–5 minutes until heated through and slightly crisp around the edges.
Listen for that faint crackle — that’s your rice getting toasty and caramelized.
Step 6: Season It Up
Add your soy sauce, garlic butter, sesame oil, and a pinch of salt and pepper. Stir well to evenly coat every grain of rice.
If you’re using protein, add it back in now.
Step 7: Combine Everything
Return the scrambled eggs to the pan and toss to combine. Add your chopped green onions and stir for the final minute.
At this point, the aroma should be absolutely irresistible — buttery, garlicky, and smoky all at once.
Step 8: Taste and Adjust
Taste for seasoning. Add a splash more soy sauce if needed, or another pat of butter for extra richness.
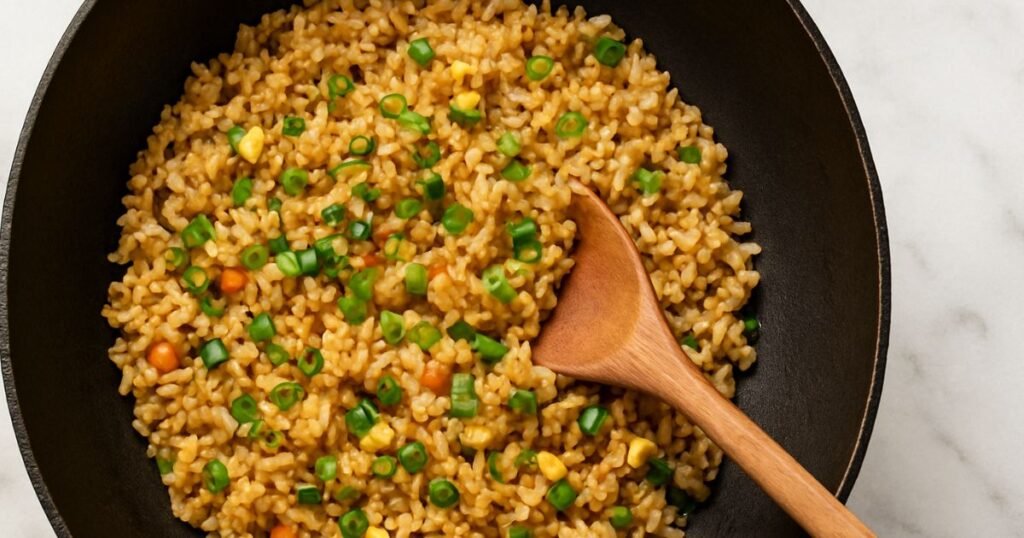
Serve hot, and don’t forget the yum yum sauce on the side
Expert Tips & Mistakes to Avoid
- Use cold rice. Fresh rice clumps together; cold, day-old rice gives you that perfect texture.
- High heat = flavor. Hibachi fried rice gets its smoky flavor from quick cooking over high heat.
- Don’t overcrowd the pan. Too much rice will steam instead of fry — work in batches if needed.
- Garlic butter is magic. That small spoonful transforms the whole dish.
- Taste as you go. Soy sauce brands vary — season gradually to avoid oversalting.
Variations & Add-Ons
- Shrimp Hibachi Fried Rice: Add cooked shrimp and a splash of lemon juice for brightness.
- Chicken Fried Rice: Dice up cooked chicken breast or thighs for a heartier version.
- Vegetarian: Skip the meat and load up with edamame, mushrooms, or zucchini.
- Spicy Kick: Add a drizzle of sriracha or sprinkle of chili flakes for heat.
- Garlic-Lover’s Edition: Double the garlic butter — trust me, it’s worth it.
You can also toss in teriyaki sauce, hoisin sauce, or a squeeze of lime juice to experiment with different flavor profiles.
Serving Suggestions
- Serve as a side with hibachi chicken, steak, or shrimp.
- Pair with yum yum sauce, ginger sauce, or teriyaki glaze.
- Top with chopped scallions or sesame seeds for restaurant-style flair.
- Turn it into a meal by adding a simple Asian cucumber salad or miso soup.
If you’re hosting dinner, serve it family-style in a big bowl — it disappears fast!
Storage & Reheating
- Refrigerate: Store leftovers in an airtight container for up to 4 days.
- Freeze: You can freeze fried rice for up to 2 months. Let it cool before sealing.
- Reheat: Warm in a skillet over medium-high heat with a splash of water or soy sauce. Microwave works too — just cover it and stir halfway through.
Pro tip: Add a dab of butter when reheating to bring back that hibachi-style flavor.
Nutrition Information (Per Serving)
| Nutrient | Amount (approx.) |
|---|---|
| Calories | 320 kcal |
| Protein | 10 g |
| Fat | 9 g |
| Carbohydrates | 48 g |
| Sugar | 2 g |
| Fiber | 1 g |
| Sodium | 690 mg |
(Values will vary depending on added protein and sauces.)
Frequently Asked Questions
What type of rice is best for hibachi fried rice?
Day-old white rice, such as jasmine or long-grain rice, works best. Its drier texture helps achieve that perfect fried, non-sticky consistency.
Why does restaurant hibachi rice taste smoky?
That signature smoky flavor comes from cooking over very high heat with oil and garlic butter, allowing the rice to slightly sear and caramelize.
Can I make hibachi fried rice with brown rice?
Yes, brown rice adds a nutty flavor and extra fiber. Just be sure it’s fully cooked, cooled, and dry before stir-frying for the best texture.
Do I need a wok to make hibachi fried rice?
No, a large nonstick or cast-iron skillet works great. The key is using high heat and giving the rice enough room to fry evenly.
What’s the difference between hibachi rice and Chinese fried rice?
Hibachi fried rice uses butter and soy sauce for flavor, while Chinese fried rice often includes oyster sauce, sesame oil, or scallions for seasoning.
How can I make this recipe vegan?
Skip the eggs and use plant-based butter or oil. Add tofu, mushrooms, or extra veggies for a satisfying vegan version of hibachi fried rice.
Conclusion
There’s something magical about making hibachi fried rice at home — the sizzle, the aroma of garlic butter, the satisfying clink of your spatula hitting the pan. It’s quick, comforting, and packed with flavor, making it perfect for busy weeknights or when you’re craving a little Japanese steakhouse nostalgia.
Every bite brings that buttery, savory, smoky goodness we all love — and once you realize how easy it is to recreate, you’ll never wait for takeout again.
So grab your wok (or your favorite skillet), get your cold rice ready, and fire up the heat. You’re just 20 minutes away from a restaurant-quality dinner that’ll have everyone asking for seconds.
If you make this hibachi fried rice recipe, let me know in the comments — and share it with a friend who loves Japanese food as much as you do!
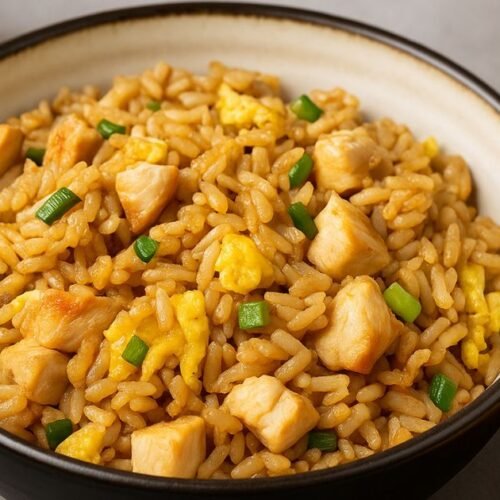
Hibachi Fried Rice Recipe
Ingredients
- For the Rice Base
- 4 cups cold day-old rice – Preferably long-grain white rice or jasmine rice.
- 2 tablespoons neutral oil like canola or vegetable oil – High smoke point oil is key for that hibachi sear.
- 2 large eggs whisked – Adds richness and color.
- For Flavor
- 2 tablespoons soy sauce – For saltiness and umami depth.
- 1 tablespoon garlic butter – The secret to that signature hibachi flavor.
- 1 teaspoon sesame oil – Adds that toasty nutty aroma.
- Salt and pepper to taste.
- Add-Ins
- ½ cup chopped onions – Gives sweetness and texture.
- ½ cup mixed veggies peas, carrots, corn – Optional but classic.
- 2 green onions finely chopped – For garnish and freshness.
- Optional proteins:
- 1 cup cooked shrimp chicken, or steak – for a full hibachi-style meal.
Instructions
- Prep Your Ingredients
- Before you start, make sure everything’s ready — this recipe moves fast!
- Chop your onions and green onions, whisk your eggs, and measure out sauces. Fried rice is all about timing, and having everything within reach keeps it fun (and stress-free).
- Heat the Pan
- Place a large wok or skillet over high heat. Add your oil and swirl it to coat the pan.
- You’ll know it’s ready when you see faint wisps of smoke — that’s your sign to get cooking.
- Scramble the Eggs
- Pour the whisked eggs into the hot pan. Stir quickly until they’re softly scrambled (about 30 seconds to 1 minute).
- Remove and set them aside. Don’t overcook — they’ll go back in later.
- Stir-Fry the Veggies
- Add a bit more oil to the pan and toss in your chopped onions. Cook for 3–4 minutes, stirring frequently, until softened and lightly golden.
- Add your mixed vegetables and cook another minute until heated through.
- Add the Rice
- Now for the best part — the rice!
- Add your cold, day-old rice straight into the pan. Use a spatula to break up clumps and stir-fry for about 3–5 minutes until heated through and slightly crisp around the edges.
- Listen for that faint crackle — that’s your rice getting toasty and caramelized.
- Season It Up
- Add your soy sauce, garlic butter, sesame oil, and a pinch of salt and pepper. Stir well to evenly coat every grain of rice.
- If you’re using protein, add it back in now.
- Combine Everything
- Return the scrambled eggs to the pan and toss to combine. Add your chopped green onions and stir for the final minute.
- At this point, the aroma should be absolutely irresistible — buttery, garlicky, and smoky all at once.
- Taste and Adjust
- Taste for seasoning. Add a splash more soy sauce if needed, or another pat of butter for extra richness.
- Serve hot, and don’t forget the yum yum sauce on the side!
Notes
- Use cold rice. Fresh rice clumps together; cold, day-old rice gives you that perfect texture.
- High heat = flavor. Hibachi fried rice gets its smoky flavor from quick cooking over high heat.
- Don’t overcrowd the pan. Too much rice will steam instead of fry — work in batches if needed.
- Garlic butter is magic. That small spoonful transforms the whole dish.
- Taste as you go. Soy sauce brands vary — season gradually to avoid oversalting.