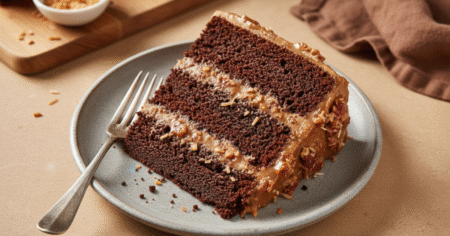




When I was growing up, Christmas wasn’t complete without a plate of homemade fudge sitting on the kitchen counter. My mom always had her well-worn recipe card for fantasy fudge tucked into her cookbook—creases, chocolate smudges, and all. It was the treat that family and neighbors expected every holiday season.
The fantasy fudge recipe is a true American classic. It first appeared on the back of Kraft marshmallow creme jars in the 1960s and quickly became a tradition in homes across the country. What makes it special is its foolproof method: sugar, butter, and evaporated milk boiled together, then combined with chocolate chips and marshmallow cream to create a smooth, dreamy fudge.
If you’ve ever struggled with grainy or too-soft fudge, this recipe is your answer. I’ll walk you step by step through the process so you’ll have perfect results every time. By the end, you’ll not only know how to make the original fantasy fudge recipe but also how to customize it, store it, and even freeze it for later.
Why You’ll Love This Fantasy Fudge Recipe
- Easy to Make: You don’t need fancy equipment—just a saucepan and a wooden spoon.
- Rich and Creamy: The marshmallow creme makes the texture silky-smooth.
- Crowd-Pleasing: A holiday favorite that everyone will ask you for.
- Customizable: Add nuts, swirl in peanut butter, or use different chocolates.
- Great for Gifting: Stores well, wraps beautifully, and makes the sweetest homemade present.
This isn’t just any fudge recipe—it’s the original fantasy fudge recipe that’s stood the test of time.
Ingredients You’ll Need
Here’s what you’ll need to make one 9×13 pan (about 36 squares):
- 3 cups granulated sugar
- ¾ cup (1½ sticks) unsalted butter
- ⅔ cup evaporated milk (not sweetened condensed)
- 1 package (12 ounces) semi-sweet chocolate chips
- 1 jar (7 ounces) marshmallow creme
- 1 teaspoon vanilla extract
- 1 cup chopped nuts (optional—walnuts or pecans are traditional)
Mini tip: Always use fresh marshmallow cream and make sure your butter is at room temperature for the smoothest fudge.
Ingredient Substitutions
- Chocolate Chips: Use dark chocolate chips for a richer taste or milk chocolate chips for sweeter fudge.
- Marshmallow Creme: You can use marshmallow fluff; it works the same way.
- Nuts: Swap walnuts for pecans, almonds, or even hazelnuts. If you don’t like nuts, skip them entirely.
- Evaporated Milk: Stick with evaporated milk for best results, but heavy cream can work in a pinch. Avoid regular milk—it won’t thicken properly.
- Butter: Unsalted butter gives you control over flavor, but salted butter can work if that’s what you have.
How to Make Fantasy Fudge
Here’s the step-by-step guide for perfect fudge every time:
- Prepare the pan (5 minutes).
Line a 9×13-inch baking dish with aluminum foil or wax paper, leaving some overhang for easy removal. Grease lightly with butter. - Mix the base (2 minutes).
In a heavy saucepan, combine sugar, butter, and evaporated milk. Stir over medium heat until sugar dissolves. - Bring to a boil (5 minutes).
Increase heat to medium-high and bring the mixture to a full rolling boil, stirring constantly. Cook for 5 minutes stirring constantly (use a candy thermometer if you like—it should reach 234°F). - Add chocolate (1 minute).
Remove from heat. Add the chocolate chips and stir until completely melted and smooth. - Add marshmallow creme and vanilla (2 minutes).
Stir in marshmallow cream and vanilla until the fudge mixture is silky. - Add nuts (optional, 1 minute).
Stir in chopped walnuts or pecans if using. - Pour and set (2 hours).
Spread evenly into your prepared pan. Let it sit at room temperature until firm, about 2 hours. - Cut and serve.
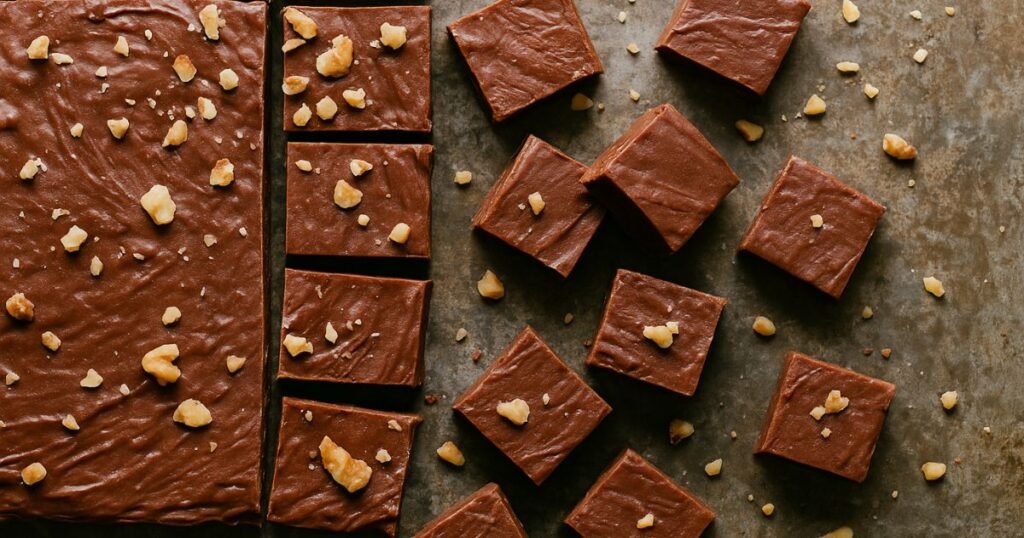
Lift fudge out of the pan using foil edges. Cut into squares with a sharp knife.

Expert Tips and Common Mistakes to Avoid
- Tip 1: Stir constantly when the mixture is boiling—this prevents burning.
- Tip 2: Don’t undercook. Boiling for less than 5 minutes can result in soft, runny fudge.
- Tip 3: Don’t overcook either—too long, and the fudge becomes dry and crumbly.
- Tip 4: Use a candy thermometer if you’re nervous—it’s foolproof.
- Tip 5: Let fudge cool at room temperature; refrigerating too soon can cause sugar crystals.
Variations & Add-Ons
- Peanut Butter Fantasy Fudge: Swirl in ½ cup peanut butter before spreading into the pan.
- White Chocolate Fudge: Substitute white chocolate chips for the semi-sweet chips.
- Mint Chocolate Fudge: Add ½ teaspoon peppermint extract and green sprinkles.
- Rocky Road Fudge: Stir in 1 cup mini marshmallows and ½ cup chopped nuts.
- Dairy-Free Version: Use vegan butter, coconut milk, and dairy-free chocolate chips.
Serving Suggestions
- Holiday Platters: Pair with cookies, peppermint bark, and toffee.
- Gift Boxes: Wrap pieces in wax paper squares or place in decorative tins.
- Party Dessert Table: Slice into bite-sized cubes for finger food.
- Everyday Treat: Serve with coffee or a cold glass of milk.
Storage & Reheating
- Room Temperature: Store fudge in an airtight container at room temperature for up to 2 weeks. Layer with wax paper to prevent sticking.
- Refrigerator: Lasts up to 3 weeks in the fridge.
- Freezer: Wrap tightly in foil and freeze fantasy fudge for up to 3 months. Thaw at room temperature before serving.
- Reheating: Fudge doesn’t need reheating, but if slightly too firm, let it sit out for 10 minutes before eating.
Nutrition Information (per serving, approx.)
- Calories: 140
- Protein: 1g
- Carbs: 20g
- Fat: 6g
- Sugar: 18g
- Sodium: 20mg
Prep, Cook, and Total Time
- Prep Time: 10 minutes
- Cook Time: 10 minutes
- Total Time: 2 hours 20 minutes (includes cooling)
Frequently Asked Questions
Why is it called Fantasy Fudge?
Fantasy Fudge got its name from Kraft when they first printed the recipe on marshmallow creme jars. It was marketed as a “fantasy” of smooth, easy fudge anyone could make at home.
Do I need a candy thermometer for fantasy fudge?
No, you can time it instead. Boil the mixture for exactly 5 minutes while stirring constantly. But a thermometer helps for accuracy if you’re new to candy-making.
Can I freeze fantasy fudge?
Yes! Wrap tightly in foil, then place in an airtight container. Freeze for up to 3 months. Thaw at room temperature before serving.
Why did my fudge turn out grainy?
Grainy fudge usually means the sugar crystallized. To avoid this, stir constantly and don’t scrape the sides of the pan once it starts boiling.
How long does fantasy fudge last?
Stored properly in an airtight container, it lasts up to 2 weeks at room temperature, 3 weeks in the fridge, and 3 months in the freezer.
Conclusion
And that’s it—you’ve just mastered the fantasy fudge recipe that has been a staple in American kitchens for decades. It’s creamy, chocolatey, and perfectly sweet with a texture that melts in your mouth.
This recipe isn’t just about fudge—it’s about tradition, sharing, and a little bit of nostalgia. Whether you’re making it for a holiday party, wrapping it as a gift, or just treating yourself, fantasy fudge will never disappoint.
👉 Give it a try this week, and let me know—did you stick with the classic version or try one of the fun variations? I’d love to hear your fudge stories!
Note: I’ve been making this fudge for years, and no holiday season feels complete without it. Trust me—once you make it, it’ll become your family’s tradition too.


Fantasy Fudge Recipe
Ingredients
- 3 cups granulated sugar
- ¾ cup 1½ sticks unsalted butter
- ⅔ cup evaporated milk not sweetened condensed
- 1 package 12 ounces semi-sweet chocolate chips
- 1 jar 7 ounces marshmallow creme
- 1 teaspoon vanilla extract
- 1 cup chopped nuts optional—walnuts or pecans are traditional
Instructions
- Prepare the pan (5 minutes).
- Line a 9×13-inch baking dish with aluminum foil or wax paper, leaving some overhang for easy removal. Grease lightly with butter.
- Mix the base (2 minutes).
- In a heavy saucepan, combine sugar, butter, and evaporated milk. Stir over medium heat until sugar dissolves.
- Bring to a boil (5 minutes).
- Increase heat to medium-high and bring the mixture to a full rolling boil, stirring constantly. Cook for 5 minutes stirring constantly (use a candy thermometer if you like—it should reach 234°F).
- Add chocolate (1 minute).
- Remove from heat. Add the chocolate chips and stir until completely melted and smooth.
- Add marshmallow creme and vanilla (2 minutes).
- Stir in marshmallow cream and vanilla until the fudge mixture is silky.
- Add nuts (optional, 1 minute).
- Stir in chopped walnuts or pecans if using.
- Pour and set (2 hours).
- Spread evenly into your prepared pan. Let it sit at room temperature until firm, about 2 hours.
- Cut and serve.
- Lift fudge out of the pan using foil edges. Cut into squares with a sharp knife.
Notes
- Stir constantly when the mixture is boiling to avoid burning.
- Don’t undercook (less than 5 minutes boiling = too soft).
- Don’t overcook (too long = dry and crumbly).
- A candy thermometer helps ensure accuracy (target 234°F).
- Store fudge in an airtight container at room temperature for up to 2 weeks.
- For longer storage, refrigerate up to 3 weeks or freeze up to 3 months.
- Variations: peanut butter swirl, mint extract, rocky road, dairy-free swaps.