

There’s something magical about the moment you slice into a piece of chicken katsu — the crisp “crack” of the coating gives way to juicy, tender meat, and suddenly you understand why this simple chicken katsu recipe is so loved around the world.
I still remember the first time I made this dish at home. My kitchen smelled like heaven — toasty breadcrumbs, sizzling oil, and that mouthwatering fried chicken aroma that pulls everyone toward the stove. It instantly became a regular in my weeknight rotation.
If you’ve never tried making chicken katsu before, don’t worry — I’ll walk you through each step. We’ll pound the chicken, bread the cutlets in panko, and fry them until golden brown (or even bake or air fry if you prefer). You’ll also get tips for keeping the crust perfectly crispy and ideas for serving it with rice, curry, or a simple salad.
Let’s dive in — dinner’s about to get delicious!
Why You’ll Love This Recipe
- Crispy, juicy perfection: Golden on the outside, tender inside — the ultimate fried chicken experience.
- Quick & easy: From start to finish, it takes about 30 minutes.
- Family-friendly: Kids love it (and so do adults).
- Versatile: Serve with white rice, curry, or in a sandwich.
- Simple ingredients: You likely already have everything in your pantry.
This is one of those comfort food recipes you’ll want to make again and again — especially on busy weeknights when you crave something satisfying but quick.
Ingredients You’ll Need
Here’s what you’ll need for this chicken katsu recipe — organized to make prep a breeze.
For the Chicken Katsu:
- 2 boneless, skinless chicken breasts – Pound thin with a meat mallet or rolling pin for even cooking.
- Salt and pepper – Season generously for balanced flavor.
- ½ cup all-purpose flour – Helps the coating stick.
- 2 large eggs, beaten – Acts as the binder for breadcrumbs.
- 1 ½ cups panko breadcrumbs – The secret to that extra crispy, light coating.
- Oil for frying (vegetable or canola) – Use enough to submerge the chicken halfway.
For the Tonkatsu Sauce (Optional but highly recommended):
- 2 tablespoons ketchup
- 1 tablespoon Worcestershire sauce
- 1 teaspoon soy sauce
- ½ teaspoon sugar
- ¼ teaspoon garlic powder
Mix well in a small bowl — this sweet, tangy sauce brings everything together.
For Serving:
- Steamed white rice – The classic side.
- Shredded cabbage or salad greens – Balances the richness.
- Lemon wedges – A quick squeeze brightens up the dish.
Prep, Cook, and Total Time
| Step | Time |
|---|---|
| Prep Time: | 10 minutes |
| Cook Time: | 20 minutes |
| Total Time: | 30 minutes |
Perfect for weeknight dinners that taste like a restaurant meal.
Ingredient Substitutions
Don’t have every ingredient? No problem — here are some easy swaps that still give you great results:
- Chicken: Try boneless chicken thighs for juicier, richer meat.
- Breadcrumbs: If you don’t have panko, you can use regular breadcrumbs — but toast them first for extra crunch.
- Flour: Use rice flour for a lighter coating or cornstarch for a gluten-free option.
- Eggs: Substitute with a mixture of 2 tablespoons mayonnaise + 1 tablespoon water if you’re out of eggs.
- Oil: Any neutral, high-smoke-point oil like peanut oil or sunflower oil works great for frying.
How to Make Chicken Katsu Recipe
Here’s your step-by-step guide to making crispy, golden chicken katsu that tastes just like your favorite Japanese restaurant’s — maybe even better.
Step 1: Prep the Chicken
Place your chicken breasts between two sheets of plastic wrap or parchment paper.
Using a meat mallet (or the bottom of a heavy pan), gently pound the chicken until it’s about ½ inch thick all over.
This step ensures even cooking and tender texture. Season both sides with salt and pepper.
Step 2: Set Up Your Breading Station
Line up three shallow bowls:
- Flour (seasoned lightly with salt)
- Beaten eggs
- Panko breadcrumbs
Dip each chicken breast first in flour, shaking off any excess. Then dip in egg, coating completely, and finally press into panko breadcrumbs.
Make sure both sides are well coated — this gives that signature crispy crunch.
(Tip: Gently press the panko onto the chicken with your hands so it adheres firmly.)
Step 3: Fry the Chicken Katsu
In a large skillet, heat about ½ inch of oil over medium-high heat (around 350°F / 175°C).
You’ll know it’s ready when a breadcrumb dropped in the oil sizzles immediately.
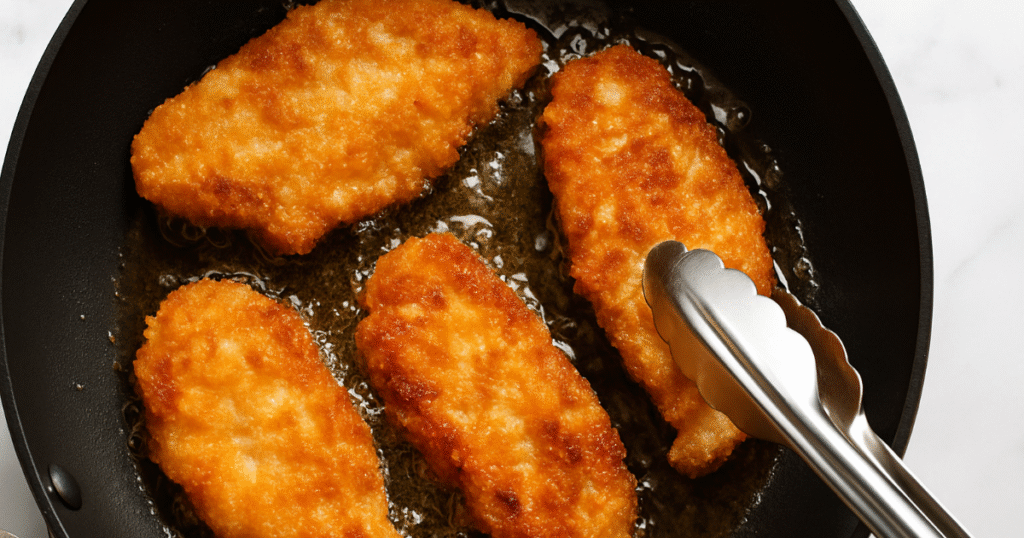
Carefully fry the chicken katsu one or two pieces at a time, about 3–4 minutes per side, until golden brown and cooked through.
Transfer to a wire rack or paper towel-lined plate to drain excess oil.
(Pro tip: The wire rack keeps the coating crisp while resting.)
Step 4: Make the Sauce
While the chicken rests, whisk together the tonkatsu sauce ingredients in a small bowl — ketchup, Worcestershire, soy sauce, sugar, and garlic powder.
Taste and adjust to your liking — I like mine a little tangier.
Step 5: Slice and Serve
Let the chicken rest for 2–3 minutes, then slice it into strips.
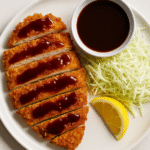
Serve over white rice with shredded cabbage, and drizzle with tonkatsu sauce.
That’s it — crispy perfection, ready to enjoy!

Expert Tips & Mistakes to Avoid
- Don’t skip pounding the chicken. This ensures even cooking and tender texture.
- Keep oil at a steady temperature. Too hot and the coating burns; too cool and it absorbs oil.
- Use panko breadcrumbs. They’re lighter, crispier, and give you that authentic crunch.
- Drain properly. Always rest the cutlets on a wire rack or paper towel to prevent sogginess.
- Cut with a sharp knife. A clean slice keeps that golden crust intact and Instagram-worthy.
Variations & Add-Ons
Make your chicken katsu your own!
- Gluten-Free Version: Use rice flour and gluten-free panko (available in most grocery stores).
- Dairy-Free: This recipe is naturally dairy-free — no changes needed!
- Air Fryer Method: Lightly spray the breaded chicken with oil and air fry at 375°F for 10–12 minutes, flipping halfway. It’s lighter but still crispy.
- Baked Chicken Katsu: Place on a wire rack set over a baking sheet and bake at 425°F for 18–20 minutes.
- Spicy Twist: Add a pinch of cayenne or chili flakes to your breadcrumbs for heat.
- Katsu Curry: Pour over rich Japanese curry sauce for a cozy, restaurant-style meal.
Serving Suggestions
- Classic: Serve over steamed white rice with shredded cabbage and tonkatsu sauce.
- Sandwich Style: Make a katsu sando — tuck sliced chicken katsu between fluffy milk bread with mayo and sauce.
- Bowl Meal: Add pickled ginger, cucumber, or soft-boiled eggs for a colorful rice bowl.
- With Curry: Pair it with Japanese curry rice for a hearty comfort meal.
- On Salad: Slice thin and top over a crisp salad with sesame dressing.
(My personal favorite: sliced over rice with extra sauce and a side of miso soup — pure comfort.)
Storage & Reheating
- Fridge: Store leftovers in an airtight container for up to 3 days.
- Freezer: Freeze cooked, cooled chicken katsu for up to 2 months. Wrap each cutlet individually for best results.
- Reheating: For crispy results, reheat in a toaster oven or air fryer at 375°F for about 5–7 minutes.
Avoid microwaving — it softens that beautiful crust.
Nutrition Information (per serving)
| Nutrient | Amount |
|---|---|
| Calories: | 480 kcal |
| Protein: | 36 g |
| Fat: | 24 g |
| Carbohydrates: | 29 g |
| Sugar: | 3 g |
| Fiber: | 1 g |
| Sodium: | 710 mg |
(Values are approximate and depend on ingredients used.)
Frequently Asked Questions
What’s the difference between chicken katsu and tonkatsu?
Chicken katsu is made with chicken, while tonkatsu uses pork. Both are breaded with panko and fried until crispy golden brown.
Can I use chicken thighs instead of chicken breasts?
Absolutely! Chicken thighs stay juicy and flavorful — just adjust the cook time slightly since they’re thicker than chicken breasts.
How do I keep the coating from falling off?
Press the panko breadcrumbs firmly onto the chicken and avoid overcrowding the pan; too much steam loosens the crust.
Can I make chicken katsu in an air fryer?
Yes! Lightly spray with oil and air-fry at 375°F for 10–12 minutes, flipping halfway through for even crispiness.
What oil should I use for frying chicken katsu?
Use neutral oils with a high smoke point like vegetable, canola, or peanut oil for the best crisp texture and clean flavor.
What should I serve with chicken katsu?
Serve with steamed white rice, shredded cabbage, and tonkatsu sauce — or turn it into a katsu curry or sandwich for variety.
Conclusion
If you’ve been craving a crispy chicken katsu recipe that’s restaurant-quality but easy enough for weeknights — this is the one.
It’s simple, golden brown perfection: juicy chicken inside, crunchy panko outside, and just the right balance of savory and sweet from that homemade tonkatsu sauce.
I’ve made this recipe countless times, and it never disappoints. Whether you fry it, bake it, or air fry it, you’ll love how satisfying it is — especially with a bowl of rice and a squeeze of lemon.
So grab your pan, heat up that oil, and make your kitchen smell amazing. And when you take that first bite (quality control, of course!), don’t be surprised if it becomes one of your new go-to weeknight dinners.
If you try this recipe, let me know how it goes — leave a comment, rate it, or share your delicious results. Happy cooking!

Chicken Katsu Recipe
Ingredients
- For the Chicken Katsu:
- 2 boneless skinless chicken breasts – Pound thin with a meat mallet or rolling pin for even cooking.
- Salt and pepper – Season generously for balanced flavor.
- ½ cup all-purpose flour – Helps the coating stick.
- 2 large eggs beaten – Acts as the binder for breadcrumbs.
- 1 ½ cups panko breadcrumbs – The secret to that extra crispy light coating.
- Oil for frying vegetable or canola – Use enough to submerge the chicken halfway.
- For the Tonkatsu Sauce Optional but highly recommended:
- 2 tablespoons ketchup
- 1 tablespoon Worcestershire sauce
- 1 teaspoon soy sauce
- ½ teaspoon sugar
- ¼ teaspoon garlic powder
- Mix well in a small bowl — this sweet tangy sauce brings everything together.
- For Serving:
- Steamed white rice – The classic side.
- Shredded cabbage or salad greens – Balances the richness.
- Lemon wedges – A quick squeeze brightens up the dish.
Instructions
- Prep the Chicken
- Place your chicken breasts between two sheets of plastic wrap or parchment paper.
- Using a meat mallet (or the bottom of a heavy pan), gently pound the chicken until it’s about ½ inch thick all over.
- This step ensures even cooking and tender texture. Season both sides with salt and pepper.
- Set Up Your Breading Station
- Line up three shallow bowls:
- Flour (seasoned lightly with salt)
- Beaten eggs
- Panko breadcrumbs
- Dip each chicken breast first in flour, shaking off any excess. Then dip in egg, coating completely, and finally press into panko breadcrumbs.
- Make sure both sides are well coated — this gives that signature crispy crunch.
- Fry the Chicken Katsu
- In a large skillet, heat about ½ inch of oil over medium-high heat (around 350°F / 175°C).
- You’ll know it’s ready when a breadcrumb dropped in the oil sizzles immediately.
- Carefully fry the chicken katsu one or two pieces at a time, about 3–4 minutes per side, until golden brown and cooked through.
- Transfer to a wire rack or paper towel-lined plate to drain excess oil.
- Make the Sauce
- While the chicken rests, whisk together the tonkatsu sauce ingredients in a small bowl — ketchup, Worcestershire, soy sauce, sugar, and garlic powder.
- Taste and adjust to your liking — I like mine a little tangier.
- Slice and Serve
- Let the chicken rest for 2–3 minutes, then slice it into strips.
- Serve over white rice with shredded cabbage, and drizzle with tonkatsu sauce.
- That’s it — crispy perfection, ready to enjoy!
Notes
- Don’t skip pounding the chicken. It ensures even cooking and a tender bite.
- Keep oil at a steady temperature. Too hot and the crust burns before the inside cooks.
- Use panko breadcrumbs. They give you that signature light and crispy texture.
- Drain on a wire rack. Keeps the coating crunchy — paper towels can make it soggy.
- Reheat properly. For best results, use an air fryer or oven instead of the microwave.