


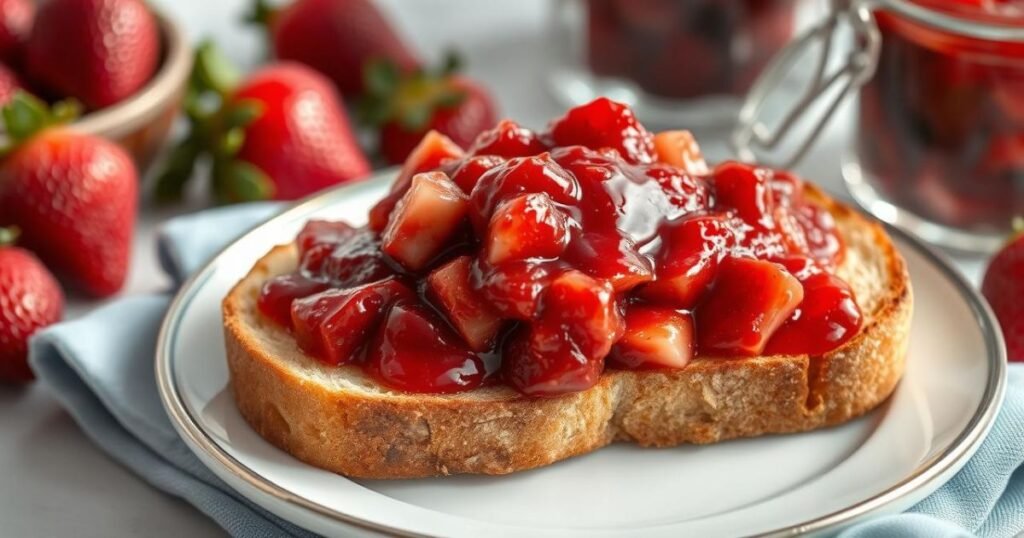
Is there anything better than opening a jar of homemade strawberry preserves on a lazy Sunday morning? If you’ve only ever tasted store-bought jam, trust me — you’re in for a real treat with this strawberry preserves recipe. I still remember the first time I made preserves from scratch: it was peak berry season, and my kitchen smelled like sweet sunshine. I couldn’t believe how simple it was — just strawberries, sugar, and a splash of fresh lemon juice!
Whether you spread it on warm toast, swirl it into yogurt, or drizzle it over ice cream, these preserves add a burst of strawberry flavor to any bite. In this post, I’ll walk you through exactly how to make your own preserves step by step, share my best tips for success, and show you how to customize them to your taste. Don’t worry if you’ve never made jam or preserves before — I’ll hold your hand the whole way. Ready to capture the taste of summer in a jar? Let’s get started!
Why You’ll Love This Strawberry Preserves Recipe
This homemade strawberry preserves recipe is the kind you’ll come back to year after year!
- ✅ Quick & Easy: No fancy tools or canning required — done in about 20 minutes!
- ✅ Fresh Strawberry Flavor: You control the sweetness and brightness.
- ✅ Kid-Friendly: No artificial ingredients — just fresh strawberries, sugar, and lemon.
- ✅ Pantry Staples: Uses simple ingredients you probably have at home.
- ✅ So Versatile: Delicious on toast, biscuits, pancakes, or swirled into ice cream.
Ingredients You’ll Need
Here’s exactly what you’ll need to make this delicious homemade strawberry preserves recipe.
For the Preserves:
- 2 pounds fresh strawberries, hulled and halved
- 2 cups granulated sugar
- 2 tablespoons fresh lemon juice
- 1 teaspoon lemon zest (optional, but brightens the flavor)
- 1 tablespoon balsamic vinegar (optional, deepens the strawberry flavor)
Mini Tip:
Use ripe, fragrant strawberries for the best results — underripe berries won’t have enough natural sweetness.
Ingredient Substitutions
Don’t worry if you’re missing an ingredient — these swaps work beautifully:
- Frozen Strawberries: You can use frozen berries, but thaw and drain them first.
- Balsamic Vinegar: Skip it or use a splash of vanilla extract instead for a sweet twist.
- Granulated Sugar: Substitute with raw cane sugar or honey — but honey may slightly alter the flavor and texture.
- Lemon Juice: Bottled will work, but fresh is best for that vibrant zing.
- Lemon Zest: Not required, but adds a lovely citrusy aroma!
How to Make Strawberry Preserves
Here’s my foolproof, step-by-step guide for making perfect preserves every time.
1. Prepare the Strawberries (5 minutes)
- Rinse the fresh strawberries under cool water, pat them dry, and hull them. Cut larger berries into halves or quarters for even cooking.
2. Combine Ingredients (5 minutes)
- In a large heavy-bottomed pot, combine strawberries, sugar, lemon juice, and lemon zest if using. Stir gently to coat the berries with sugar.
3. Cook the Preserves (15–20 minutes)
- Place the pot over medium-high heat and bring the mixture to a boil, stirring often.
- Reduce to medium heat and continue cooking. Use a wooden spoon to mash some of the berries, leaving others chunky for texture.
- Stir frequently until the mixture thickens and reaches a jammy consistency — about 15–20 minutes. It should coat the back of a spoon and form soft, slow droplets when you drip it off the spoon.
Sensory Cue:
The preserves should be glossy and bubbling steadily. You’ll smell that deep, sweet strawberry aroma!
4. Test & Jar the Preserves (5 minutes)
- Remove the pot from the heat. To test, place a small spoonful on a chilled plate — it should hold its shape and not run all over.
- Carefully ladle the warm preserves into clean mason jars. Let cool to room temperature, then seal tightly and refrigerate.
Expert Tips for Success
✅ Use Ripe Strawberries: The riper the berries, the sweeter and more flavorful your preserves will be.
✅ Stir Often: Sugar can burn quickly — stir frequently to prevent sticking.
✅ Don’t Overcook: Overcooking can lead to a thick, sticky preserve. Once it coats your spoon and thickens slightly, it’s ready!
✅ Chill a Plate: Use a chilled plate to test for doneness — if it wrinkles when pushed, you’re good to go.
✅ Small Batches: This recipe works best in small batches to ensure even cooking and the freshest taste.
Variations & Add-Ons
Your strawberry preserves are delicious as-is, but here are some fun ways to switch things up!
- Low-Sugar Preserves: Use a low-sugar pectin or reduce sugar by 1/2 cup — just know they may be looser in texture.
- Mixed Berry Preserves: Add raspberries or blueberries for extra flavor.
- Spicy Twist: Stir in a pinch of ground black pepper or a splash of bourbon for depth.
- Herbal Note: Add fresh basil or mint during cooking for a unique spin.
- Vanilla Strawberry Preserves: Stir in 1/2 teaspoon of pure vanilla extract once off the heat.
Serving Suggestions
- Slather on toast, biscuits, or English muffins.
- Swirl into yogurt or oatmeal for a sweet breakfast treat.
- Spoon over vanilla ice cream for an instant dessert.
- Use as a filling for crepes, cakes, or homemade tarts.
- Pair with cheese and crackers on a charcuterie board.
Storage & Reheating
Fridge: Store cooled preserves in a clean, airtight mason jar. They’ll keep for up to 3 weeks in the refrigerator.
Freezer: Transfer cooled preserves to a freezer-safe container, leaving room for expansion. Freeze for up to 3 months. Thaw overnight in the fridge.
Reheating: Not needed — just bring to room temperature if they’ve thickened too much.
Nutrition Information (per tablespoon)
Approximate values:
- Calories: 40
- Protein: 0g
- Carbs: 10g
- Fat: 0g
- Sugar: 9g
- Sodium: 0mg
- Fiber: 0.5g
Prep, Cook & Total Time
| Prep Time | Cook Time | Total Time |
|---|---|---|
| 5 minutes | 20 minutes | 25 minutes |
Frequently Asked Questions
Do I need pectin for strawberry preserves?
Nope! Strawberries have natural pectin and the sugar helps them thicken. Just cook until the preserves reach the right consistency.
Can I use frozen strawberries?
Yes! Thaw and drain frozen strawberries first so they don’t add too much liquid to your preserves.
How do I know when my preserves are done?
Use the spoon test! The preserves should coat the back of a spoon and slowly drip off in thick drops. A chilled plate test works too.
How long do strawberry preserves last?
Homemade strawberry preserves will keep for about 3 weeks in the fridge, or up to 3 months in the freezer.
What’s the difference between jam and preserves?
Great question! Jam is more spreadable and smooth, while preserves have larger pieces of fruit for a chunkier texture.
Conclusion
And there you have it — my favorite strawberry preserves recipe, fresh, vibrant, and easy enough for beginners! It’s a simple way to capture the best of berry season and enjoy it for weeks to come. Give this a try, and I promise you’ll never look at store-bought jam the same way again. If you make it, leave a comment below, rate the recipe, or share your favorite twist — I’d love to hear how you enjoy these sweet preserves!

Strawberry Preserves Recipe
Ingredients
- For the Preserves:
- 2 pounds fresh strawberries hulled and halved
- 2 cups granulated sugar
- 2 tablespoons fresh lemon juice
- 1 teaspoon lemon zest optional, but brightens the flavor
- 1 tablespoon balsamic vinegar optional, deepens the strawberry flavor
Instructions
- Prepare the Strawberries (5 minutes)
- Rinse the fresh strawberries under cool water, pat them dry, and hull them. Cut larger berries into halves or quarters for even cooking.
- Combine Ingredients (5 minutes)
- In a large heavy-bottomed pot, combine strawberries, sugar, lemon juice, and lemon zest if using. Stir gently to coat the berries with sugar.
- Cook the Preserves (15–20 minutes)
- Place the pot over medium-high heat and bring the mixture to a boil, stirring often.
- Reduce to medium heat and continue cooking. Use a wooden spoon to mash some of the berries, leaving others chunky for texture.
- Stir frequently until the mixture thickens and reaches a jammy consistency — about 15–20 minutes. It should coat the back of a spoon and form soft, slow droplets when you drip it off the spoon.
- Sensory Cue:
- The preserves should be glossy and bubbling steadily. You’ll smell that deep, sweet strawberry aroma!
- Test & Jar the Preserves (5 minutes)
- Remove the pot from the heat. To test, place a small spoonful on a chilled plate — it should hold its shape and not run all over.
- Carefully ladle the warm preserves into clean mason jars. Let cool to room temperature, then seal tightly and refrigerate.
Notes
✅ Stir Often: Sugar can burn quickly — stir frequently to prevent sticking.
✅ Don’t Overcook: Overcooking can lead to a thick, sticky preserve. Once it coats your spoon and thickens slightly, it’s ready!
✅ Chill a Plate: Use a chilled plate to test for doneness — if it wrinkles when pushed, you’re good to go.
✅ Small Batches: This recipe works best in small batches to ensure even cooking and the freshest taste.


