


")
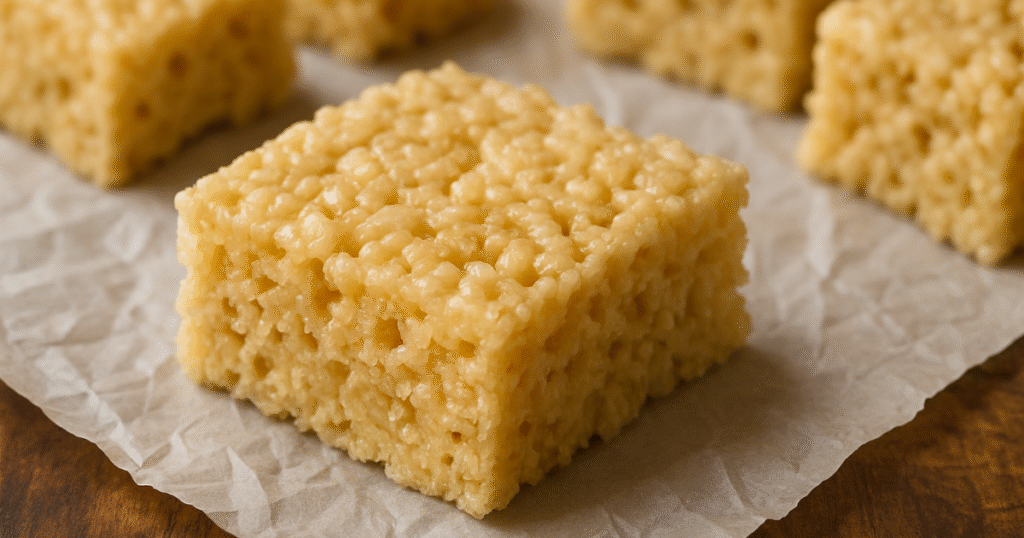
There’s just something magical about a homemade rice crispy treats recipe, isn’t there? I grew up making these with my mom, standing on a stool, trying not to eat the marshmallows straight from the bag. It’s one of those classic American desserts that takes almost no time and instantly brings you back to childhood.
Whether you’re making them for a bake sale, birthday party, or just a Tuesday night sweet tooth situation, this rice crispy treats recipe is quick, foolproof, and totally nostalgic. And don’t worry if you’ve never made them before—I’ll walk you through everything: ingredients, smart tips, tasty variations, and how to store them so they stay just-right chewy.
Why You’ll Love This Recipe
- Super easy and fast – Just melt, stir, and press—done in under 15 minutes!
- No baking required – Great for hot days or last-minute treats.
- Crowd-pleasing – Kids and adults always grab seconds.
- Perfectly gooey and crispy – No dry, stiff bars here.
- Simple pantry ingredients – Just butter, marshmallows, and cereal.
(Bonus: You can sneak in chocolate chips or peanut butter for extra flair!)
Ingredients You’ll Need
Here’s what you’ll need for the classic version:
- 6 cups Rice Krispies cereal (or any crispy rice cereal)
- 1 (10 oz) bag mini marshmallows (plus 1 cup extra for gooey pockets)
- 4 tbsp unsalted butter, cut into pieces
- ½ tsp vanilla extract (optional but adds depth of flavor)
- Pinch of salt (optional, for balance)
- Nonstick spray or parchment paper (for lining pan)
Tip: Use fresh marshmallows! Older, dry marshmallows don’t melt as well and can make your bars stiff.
Ingredient Substitutions
Here are a few swaps if you’re missing ingredients or want to get creative:
- Vegan butter – Works perfectly for dairy-free versions.
- Dandies or vegan marshmallows – Great if you need gelatin-free.
- Brown butter – Take a few minutes to brown the butter for a richer, nutty flavor.
- Fruit-flavored cereal – For a colorful, kid-approved twist.
- Peanut butter or almond butter – Stir in ½ cup with the melted marshmallows for added richness.
Just be aware: sticky or sweet add-ins can slightly affect the firmness or set of the bars.
How to Make Rice Crispy Treats Recipe
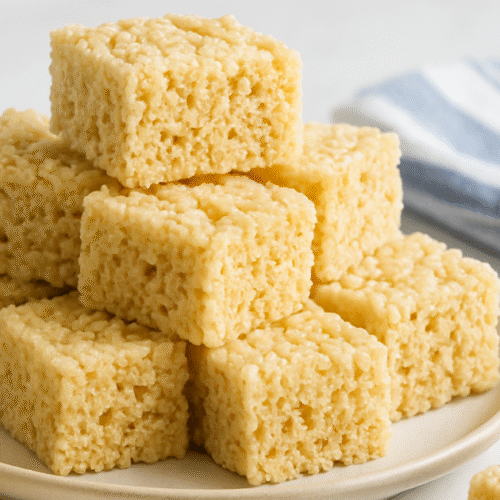
This recipe makes a standard 9×9 or 9×13 pan of treats, depending on how thick you like them!
1. Prep Your Pan (2 minutes)
Line a baking dish with parchment paper or lightly grease it with nonstick spray. Set aside.
2. Melt the Butter (2–3 minutes)
In a large pot, melt the butter over medium heat, stirring occasionally. If you’re feeling fancy, keep cooking it until it turns golden brown and smells nutty—yum.
3. Add the Marshmallows (2–3 minutes)
Pour in the mini marshmallows (save that extra 1 cup for later if using) and stir constantly until melted and smooth. Reduce heat to low. Stir in vanilla extract and a pinch of salt if using.
4. Stir in the Cereal (1 minute)
Turn off the heat and immediately add the Rice Krispies. Stir until everything is coated evenly. Fold in the extra cup of mini marshmallows now if you want gooey pockets.
5. Press and Set (5 minutes + cooling)
Transfer mixture to the prepared pan. Use a lightly greased spatula or wax paper to gently press into an even layer. Don’t pack too hard or your bars will be dense!
Let cool at room temperature for at least 30 minutes before slicing.
Expert Tips and Common Mistakes to Avoid
Pro Tips:
- Low heat = gooey bars. High heat cooks the sugar too hard and makes the treats stiff.
- Don’t overpack. Press gently or they’ll be tough instead of soft.
- Fresh is best. Old marshmallows won’t melt properly.
- Grease your spatula or hands with butter or oil so it doesn’t stick.
Avoid These Mistakes:
- Burning the butter – It goes from brown to black fast. Watch it closely.
- Using stale cereal – You’ll miss that crispy texture.
- Overheating the marshmallows – It makes your bars dry and rubbery.
Variations & Add-Ons
Get creative! Rice crispy treats are a blank canvas.
Flavor Ideas:
- Peanut Butter – Stir in ½ cup peanut butter with the marshmallows.
- Chocolate Drizzle – Melt ½ cup chocolate chips and drizzle on top.
- Cookies & Cream – Add 1 cup crushed Oreos to the mix.
- S’mores – Fold in mini chocolate chips and crushed graham crackers.
Dietary Tweaks:
- Gluten-Free – Make sure your cereal is certified gluten-free.
- Vegan – Use vegan butter and gelatin-free marshmallows like Dandies.
- Low Sugar – Use sugar-free marshmallows and reduce the amount slightly.
Serving Suggestions
- Cut into squares and wrap in wax paper for lunchboxes or picnics.
- Serve on a dessert platter with chocolate-dipped strawberries or brownies.
- Make bite-size rounds and dip in white chocolate for party treats.
- Turn into holiday fun—use cookie cutters for shapes, then decorate!
These are also perfect for bake sales, potlucks, birthday parties, and movie nights.
Storage & Reheating
Storing:
Place in an airtight container at room temperature for up to 3 days. You can layer them with parchment to keep them from sticking.
Freezing:
Yes! Wrap tightly and freeze for up to 6 weeks. Thaw at room temp.
Reheating:
Not needed usually, but if you want that just-made texture, microwave for 5 seconds—no longer, or they’ll melt.
Nutrition Information (Per Serving)
- Calories: 140
- Carbohydrates: 28g
- Protein: 1g
- Fat: 3.5g
- Saturated Fat: 2g
- Fiber: 0g
- Sugar: 15g
- Sodium: 85mg
(Nutrition may vary based on brand of ingredients.)
Prep, Cook & Total Time
| Prep Time | Cook Time | Total Time |
|---|---|---|
| 5 mins | 10 mins | 15 mins |
Frequently Asked Questions
Why are my rice crispy treats hard?
You likely overheated the marshmallows. Always melt them on low heat and stir gently to keep them soft and gooey.
Can I make rice crispy treats without marshmallows?
Yes! Try a mix of nut butter and honey or maple syrup as a binder. It’s a different flavor but still delicious.
How long do rice crispy treats stay fresh?
They stay fresh at room temperature for up to 3 days in an airtight container. For longer storage, freeze them.
Can I use large marshmallows instead of mini?
Yes, just chop them into smaller pieces so they melt evenly. You’ll need about 40 large marshmallows for this recipe.
What cereal can I use instead of Rice Krispies?
Try Cheerios, Fruity Pebbles, Cocoa Pebbles, or even cornflakes. Just keep the same measurements.
Conclusion
This rice crispy treats recipe is the ultimate no-bake dessert that never goes out of style. Gooey, crunchy, and ridiculously easy—it’s one of those sweet little wins you can whip up anytime.
Whether it’s your first time making them or your hundredth, I promise this version comes out perfect every time. So grab those marshmallows, and let’s make some magic in the kitchen!
Have questions? Tried it your own way? I’d love to hear in the comments! Don’t forget to rate and share with your dessert-loving friends.
Rice Crispy Treats Recipe
Ingredients
- 6 cups Rice Krispies cereal or any crispy rice cereal
- 1 10 oz bag mini marshmallows (plus 1 cup extra for gooey pockets)
- 4 tbsp unsalted butter cut into pieces
- ½ tsp vanilla extract optional but adds depth of flavor
- Pinch of salt optional, for balance
- Nonstick spray or parchment paper for lining pan
Instructions
- Prep Your Pan (2 minutes)
- Line a baking dish with parchment paper or lightly grease it with nonstick spray. Set aside.
- Melt the Butter (2–3 minutes)
- In a large pot, melt the butter over medium heat, stirring occasionally. Optionally, brown the butter for extra flavor.
- Add the Marshmallows (2–3 minutes)
- Pour in the mini marshmallows (save the extra cup for later if using) and stir constantly until melted and smooth. Reduce heat to low. Stir in vanilla extract and a pinch of salt if using.
- Stir in the Cereal (1 minute)
- Turn off the heat and immediately add the Rice Krispies. Stir until evenly coated. Fold in the extra cup of mini marshmallows if desired.
- Press and Set (5 minutes + cooling)
- Transfer mixture to the prepared pan. Use a lightly greased spatula or wax paper to gently press into an even layer. Let cool at room temperature for at least 30 minutes before slicing.
Notes
- Use fresh marshmallows – Old marshmallows don’t melt well and can cause the bars to be stiff.
- Don’t press too hard – Firm pressing can make the bars dense instead of soft and gooey.
- Add-ins welcome! Try peanut butter, chocolate chips, or crushed cookies for extra flavor.
- Store in an airtight container at room temperature for up to 3 days or freeze for up to 6 weeks.
Hi, I’m Daniel Brian – a passionate food blogger and cooking expert with a love for turning simple ingredients into unforgettable meals. With years of experience in the kitchen and a deep appreciation for global flavors, I share tested recipes, cooking tips, and flavor-packed dishes to inspire home cooks of all levels. Whether it’s comfort food, quick weeknight dinners, or impressive dishes for guests, I’m here to help you cook with confidence and creativity. Let’s make every meal something to look forward to!
Related Posts


